Showing posts with label Dessert. Show all posts

Wednesday, 1 May 2024

Chocolate Chip Cookies

 Ingredients:


Plain flour - 280 g / 2 + 1/4 cups
Baking soda - 1 tsp
Cornflour - 1 + 1/2 tsp
Salt - 1/2 tsp
Unsalted butter - 170 g / 3/4 cups (melted & cooled for 5 minutes before use)
Light/dark brown sugar - 150 g / 3/4 cups
Granulated sugar - 100 g / 1/2 cups
Large egg - 1
Egg yolk - 1 
Vanilla extract - 2 tsp
Chocolate chips - 220 g / 1 + 1/4 cups


Chocolate Chip Cookies


Recipe:
  1. Whisk the flour, baking soda, cornflour, and salt together in a large bowl. Set aside.
  2. In a medium bowl, whisk the melted butter, brown sugar, and granulated sugar together until no brown sugar lumps remain. Whisk in the egg and egg yolk. Finally, whisk in the vanilla extract. The mixture will be thin. 
  3. Pour the wet mix into dry ingredients and mix together with a large spoon or rubber spatula. The dough will be very soft, thick, and appear greasy. Fold in the chocolate chips. The chocolate chips may not stick to the dough because of the melted butter, but do your best to combine them.
  4. Cover the dough tightly with cling film and chill in the refrigerator for at least 2–3 hours or up to 3 days. 
  5. Take the dough out of the refrigerator and allow it to slightly soften at room temperature for 10 minutes.
  6. Preheat oven to 160°C (325°F). Line large baking sheets with parchment paper. Set aside.
  7. Take the dough and roll into a ball, making sure the shape is taller rather than wide—almost like a cylinder. This helps the cookies bake up thicker. Repeat with remaining dough. Place 8–9 balls of dough onto each cookie sheet. 
  8. Bake the cookies for 12–13 minutes or until the edges are very lightly browned. The centers will look very soft, but the cookies will continue to set as they cool. Cool on the baking sheet for 10 minutes. After 10 minutes of cooling on the baking sheets, transfer cookies to a wire rack to cool completely.
  9. Cookies stay fresh covered at room temperature for up to 1 week.

Saturday, 6 May 2023

Apple Crumble

 Ingredients:

Plain flour - 150 g
Butter - 75 g
Demerara Sugar - 40 g
Demerara Sugar - 1 tbsp
Large Cooking Apples - 2 (peeled, cored and sliced into small cubes)
Ground cinnamon - 1/2 tsp

Apple Crumble


Recipe:
  1. Put oven at 180°C or Gas mark 4
  2. Sieve the flour into a mixing bowl
  3. Add the butter and rub it in using fingertips until the mixture resembles breadcrumbs
  4. Stir in the sugar (40g) and set aside
  5. Put the apples (peeled, cored and sliced into small cubes) into an ovenproof dish with 1 tablespoon of sugar, 2 tablespoons of water and the ground cinnamon
  6. Sprinkle the crumble over the fruit, making sure all the fruit is covered (do not press down otherwise a crack will form on top of the crumble when cooked)
  7. Put the dish in the vine and bake for around 35 minutes until the fruit is baked (poke it with a fork, if the fork comes out clean, it is baked properly) or until the crumble is lightly browned
  8. Once cooked, remove from oven and leave to cool before serving.

Black Forest Cake

 Ingredients:

All purpose flour - 1 cup
Cocoa Powder - 1/2 cup
Baking Powder - 1 + 1/2 tsp baking powder
Baking Soda - 2 pinches
Salt - 1/4 tsp
Egg whites - 4
Egg yolks - 4
Caster sugar - 150 g (3/4 cup) 
Vanilla extract - 2 tsp
Sunflower oil - 3/4 cup

For the syrup:

Sugar - 6 tbsp
Water - 6 tbsp
Syrup from canned cherries (if using) - 2 + 1/2 tbsp

For the whipped cream:

Whipping cream - 600 ml
Powdered sugar - 1/2 cup + 2 tbsp

Canned cherries (for decoration)


Black Forest Cake


Recipe
  1. Grease and line a 9” cake tin with parchment paper
  2. Preheat oven to 180°C
  3. Mix together the flour, baking powder, baking soda, cocoa powder and salt in a mixing bowl and set aside
  4. Beat you egg whites till they are fluffy (this may take some time, so I suggest using a stand mixer)
  5. Once they start to form soft peaks, gradually add in the sugar
  6. Continue beating until the egg whites are glossy
  7. Add in the egg yolks and vanilla extract and beat
  8. Gradually add in the oil and continue beating for another 1 or 2 minutes
  9. Add in the dry ingredients and lightly fold in using a spatula
  10. Pour the batter into the lined cake tin
  11. Tap the tin to release air bubbles and bake at 180°C for around 25 minutes (to check if the cake is cooked, insert a fork, and if it comes out clean, the cake is baked.)
  12. Leave cake to cool while you prepare the sugar syrup.
  13. Add the sugar and water to a pan on medium heat on the stove.
  14. Let the syrup boil and let the sugar dissolve (this will take around 5 minutes). Set aside
  15. Whip the cream and sugar till you have stiff peaks.
  16. Remove the cake from the tin and cut horizontally into two.
  17. Soak the cake layers in the sugar syrup. Spread a third of the whipped cream on the first cake layer
  18. Put the next cake layer on top. Cover the scale with the rest if the whipped cream and top with cherries

Saturday, 10 November 2018

Cherry and Almond Cake

Cherry and Almond Cake is one of my most favourite cakes, never disappoints and always a hit with family and friends. Soft on inside and with a thin crust on the outside.


Ingredients

Butter, softened (at room temperature) - 175 gram (200?)
Golden caster sugar - 175 gram (200?)

Eggs - 4
Almond  extract - ½ tsp

Self-raising flour - 175 gram
Baking powder - ½ tsp
Ground Almonds - 125 gram

Milk - 100ml

Glace cherries - 300 gram
Flaked Almonds - 2 tbsp

Recipe

  1. Heat oven to 140C fan
  2. Line the base of a 20cm deep cake tin, scrape butter on sides
  3. Rinse and dry the cherries thoroughly, then halve and dust with flour
  4. Beat together the butter and sugar until light and fluffy
  5. Add Almond extract
  6. Add eggs one at a time, beating on low just until they are mixed in
  7. Fold in the flour, baking powder and ground almonds
  8. Optionally add half of the cherries to batter at this stage
  9. Add milk, and fold a bit
  10. Pour batter into the tin
  11. Add cherries on top
  12. Scatter over the flaked almonds
  13. Bake for 45 mins (Check after 30-35 minutes)
  14. Check and bake for another 5-10 minutes if the cake is not done
  15. Cool the cakes in the pan on a wire rack for 10 minutes


Thursday, 24 May 2018

Date Truffles

It's a Ramadan special delight, it's a date and chocolate combination, kids love it, not just eating but the helping out in preparing for Iftaar, and the added bonus is it is super quick to make.

Ingredients

Medjool dates (or any other soft date)  - 4 large
Almond powder - 200 gram (Ground Almonds)
Honey - 1 tablespoon
Coconut oil - 1 teaspoon
Cinnamon powder -  1/2 teaspoon
Vanilla - 1/4 teaspoon
Salt - pinch
Cocoa powder - 2 tablespoon

Date Truffles


Recipe
  1. Place all ingredients in a food processor and pulse to make a paste (add a teaspoon of water if the mixture is stiff)
  2. Spoon small amounts of the paste into the palm of your hands and roll into small balls
  3. Leave in the fridge for 15 minutes
  4. Roll in Cocoa powder before serving
Note: Don't use too much cocoa powder, I did the mistake (see picture), because too much cocoa tastes bitter.

Friday, 3 February 2017

Apple and cinnamon cake


Ingredients
4 apples
1 tbsp cinnamon
4 tbsp sugar
1 ½ cup all-purpose flour
1 tbsp baking powder
a pinch of salt
4 eggs
6 oz (180g) butter, softened
1 1/3 cup brown sugar
½ cup milk
1/4 cup flaked almonds
1/4 tsp cinnamon 


Recipe

  1. Preheat the oven at 350ºF (180ºC). 
  2. Grease a spring-form pan. 
  3. Peel and slice the apples. Toss them with 1 tbsp cinnamon and 4 tbsp sugar. Set aside.
  4. In a medium bowl, sift the flour, baking powder, and salt.
  5. In another bowl, cream the softened butter and the sugar until light and fluffy.
  6. Add the eggs, one at a time, beating after each addition.
  7. Fold the sifted flour alternately with milk.
  8. Pour half the batter in then spread the apples. 
  9. Pour the remaining batter. 
  10. Combine the flaked almonds with the cinnamon and sprinkle over the cake.
  11. Bake for one hour or until a toothpick inserted comes out clean.

Saturday, 28 January 2017

Marble Cake

Ingredients

Plain flour - 250 gram
Unsalted butter (softened) - 200 gram
Caster sugar - 200 gram
Milk (full-fat) - 40 ml 
Vanilla extract - ½ tea spoon
Eggs (large) - 3
Baking powder - 3 tea spoon
Cocoa powder (unsweetened) - 2 tea spoon
Icing sugar (for dusting)


Recipe

  1. Preheat the oven 180C.
  2. Line a 1kg loaf tin with baking parchment.
  3. In a large bowl, beat the butter, 180g of the sugar and the vanilla extract together until the mixture is light and fluffy. 
  4. Beat in the eggs, one at a time.
  5. Add the baking powder.
  6. Sift the flour over the mixture.
  7. Fold in with 2 tbsp of the milk.
  8. Spoon two-thirds of the mixture into the prepared loaf tin – it should fill the tin three-quarters of the way.
  9. Sift the cocoa in the remaining third of the mixture and fold in, together with the remaining milk and 20g of sugar.
  10. Spoon the chocolate mixture over the cake mixture in the tin, then run a fork through both mixtures, gently swirling the two together to create a marbled effect.
  11. Be careful not to swirl the mixtures together too much as you want to leave an obvious marble effect.
  12. Bake for 55–70 minutes, until the cake shrinks slightly from the sides of the tin. Test it is cooked by inserting a skewer into the centre and it comes out clean (test the cake after 55 minutes).
  13. Remove the cake from the tin and leave to cool on a wire rack. 
  14. Once cooled, dust with icing sugar.


Sunday, 1 January 2017

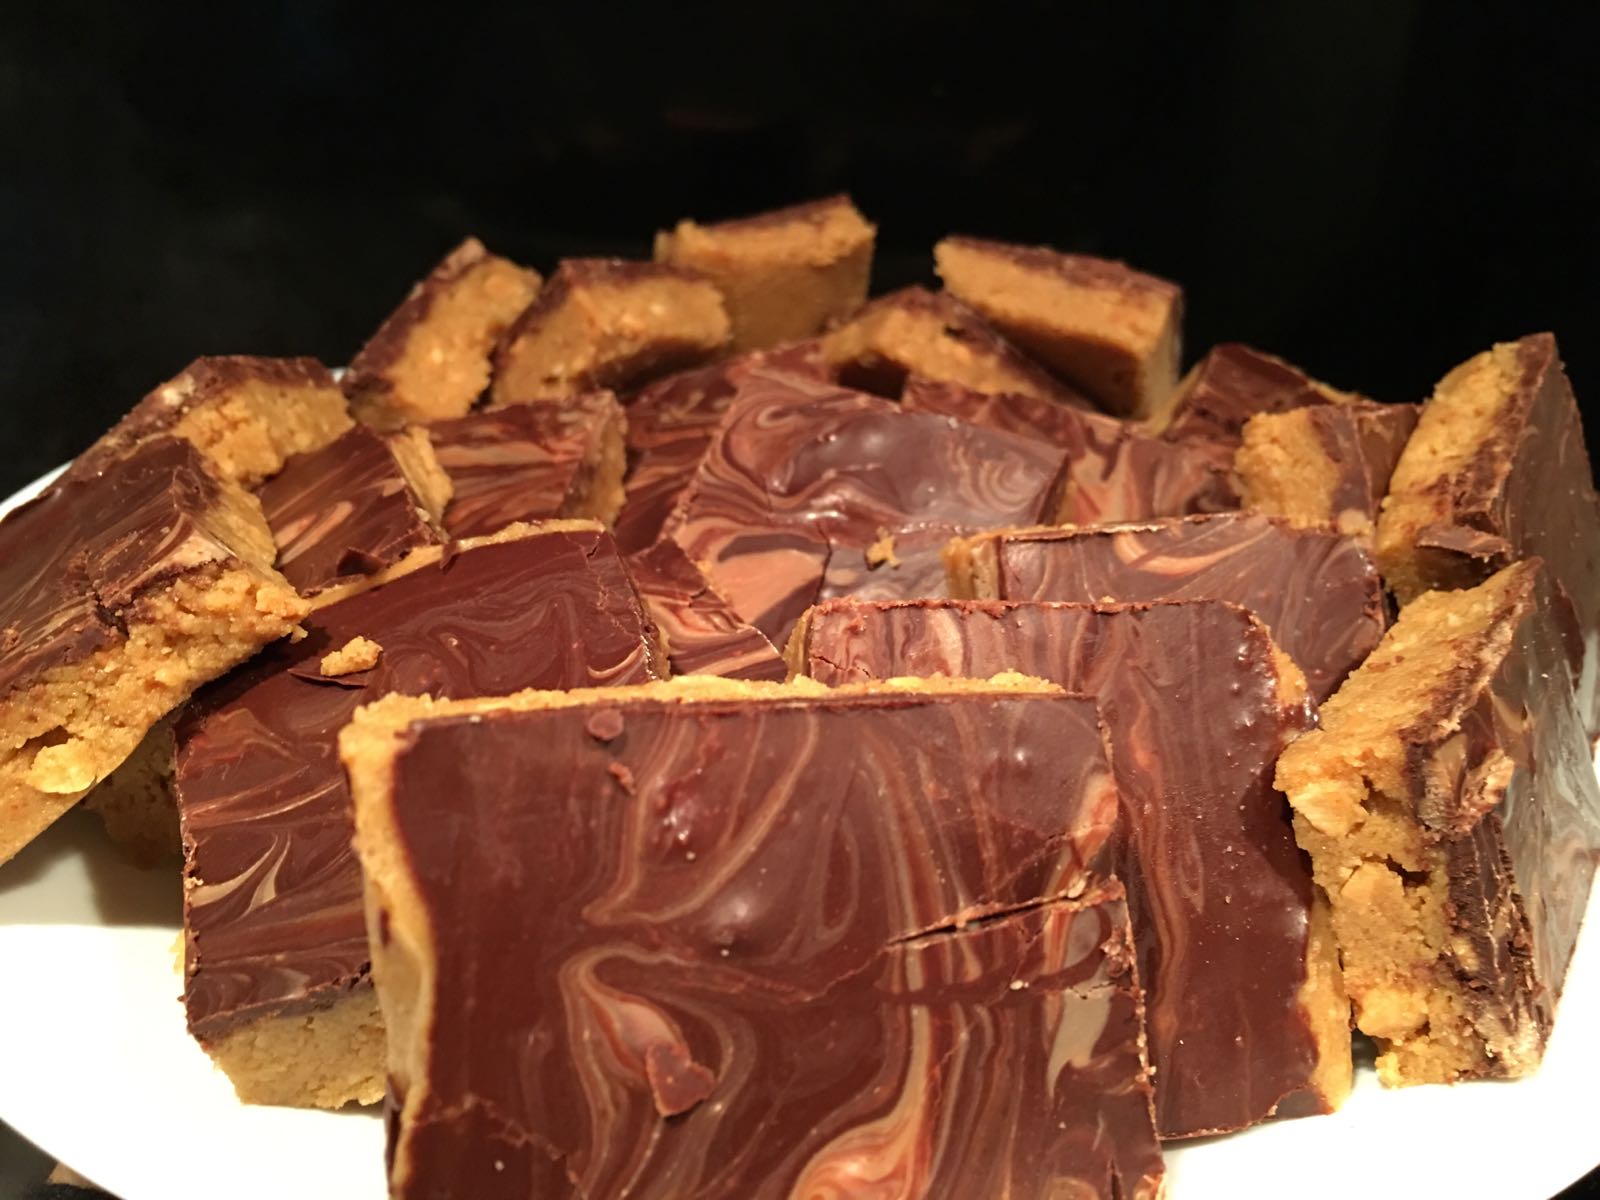
Chocolate Peanut Butter Squares (No-Bake)


Ingredients

Butter - 150 gram
Dark chocolate - 150 gram
Milk chocolate - 50 gram
Digestive biscuits - 250 gram
Soft light brown sugar - 200 gram
Crunchy peanut butter - 300 gram
Vanilla extract - 1 tea spoon

Chocolate Peanut Butter Squares

Recipe
  1. Line a baking tin with parchment paper.
  2. Melt the butter in a large pan over a low heat.
  3. Blitz the biscuits and brown sugar in a a food processor to give fine crumbs. 
  4. Add to melted butter. 
  5. Add peanut butter and vanilla extract and mix together.
  6. Tip the mixture into the lined tin and press it down really hard with the back of the spoon.
  7. Melt the dark chocolate into a small bow (sit the bowl over a pan over simmering water, make sure that the bottom of the pan does not touch the water or the chocolate may ‘seize’ and go really grainy and stiff)
  8. Pour over the melted dark chocolate into the tin, tilting the tin back and forth a bit so that the whole thing is evenly covered. 
  9. Melt the milk chocolate, pour over the tin at different places, make swirls with a spoon.
  10. Pop in the fridge for 2 hours to firm up.
  11. Once the chocolate is set, remove it from the fridge. Lift it out of the tin with the help of the baking parchment. 
  12. Use a sharp knife to divide it into squares.


Saturday, 31 December 2016

Banana Loaf

Ingredients

Banana (ripe) - 2 

Milk - 2 table spoon
Soft butter - 100 gram
Plain flour - 150 gram
Caster sugar - 150 gram
Bicarbonate of soda - 1 tea spoon
Baking powder - 1 tea spoon
Egg - 2
Caramel flavouring - 1 tea spoon

Dark chocolate chips - 100 gram


Recipe

  1. Preheat the oven 160C/325F.
  2. Grease and line a 900g / 2lb loaf tin with non-stick baking parchment.
  3. Use a fork to mash the peeled banana in a mixing bowl. 
  4. Add the remaining cake ingredients (except the chocolate chips) and beat with an whisker until combined and smooth.
  5. Stir in the chocolate chips and spoon the mixture into the prepared loaf tin. Level the top.
  6. Bake for 50 minutes or until well risen, shrinking away from the sides of the tin and golden-brown.
  7. Set aside to cool for 10 minutes, then remove from the tin and leave to cool on a wire rack.
  8. Slice and serve.

Thursday, 27 October 2016

Kesar Peda (Indian Milk Dessert)

Kesar Peda (Indian Milk Dessert) is a Saffron infused milk sweet. 

Pedas originated in the city of Mathura in present-day Uttar Pradesh. Traditionally it is made with Khoya. However instant recipe uses condensed milk and milk powder and can be made in microwave in hardly 10 minutes.

Kesar Peda


Ingredients
Milk Powder - 120 gram 
Condensed milk - 200 gram 
Unsalted Butter - 20 gram (room temperature)
Cardamom Powder - 1/3 teaspoon 
Pistachio - 5-6 (thinly sliced)
Saffron - pinch in 2 tea spoon milk

Recipe

  1. Soak saffron threads in warm milk to get a nice colour from it
  2. Add melted butter to a microwavable bowl
  3. Add milk powder one spoon at a time and keep mixing with a spatula
  4. Add Condensed milk and keep mixing
  5. Microwave for a minute
  6. Add Saffron milk
  7. Add Cardamom powder
  8. Mix with spatula
  9. Microwave for a minute
  10. Mix with spatula
  11. Microwave for a minute
  12. Leave to cool down in fridge for about an hours
  13. Roll it  in a round shape and then flatten gently giving it a shape of peda
  14. Garnish with pistachio, Cardamom powder and saffron(optional), sticking them to centre

Thursday, 13 October 2016

Expresso Cookies


I used to get these cookies from Bon Bon Pastry Shop in New Friends Colony, New Delhi and I have loved these since.


Expresso Cookies
Ingredients

Granulated sugar - ¾ cup
Unsalted Butter - ¾ cup (room temperature)
Vanilla - ½ tea spoon
Salt - ¼ tea spoon
Egg - 1
Plain flour - 1 and ¾ cup 
Cocoa - 3 tablespoon

Expresso filling
Full cream - ¼ cup
Choc chips or broken pieces of a dark chocolate bar - 1 cup
Instant espresso coffee or regular Nescafe - 2 tea spoon


Recipe
  1. Preheat oven to 175°C/ 325°F
  2. Beat sugar, butter, vanilla and egg in a large bowl. 
  3. Stir in flour, cocoa and salt.
  4. Shape dough by rounded teaspoonfuls into small balls. 
  5. Place about 2 inches apart on an ungreased cookie sheet. 
  6. Press thumb or end of wooden spoon into centre of each cookie, but do not press all the way to the cookie sheet.
  7. Bake 10 mins or until edges are firm. Mine took 10 mins. 
  8. Quickly remake indentations with end of wooden spoon (or thumb) if necessary. Immediately remove from cookie sheet to wire rack. Cool completely, about 30 mins.
  9. Meanwhile for expresso filling, mix cream and instant coffee in saucepan. 
  10. Heat over medium heat, stirring constantly until coffee is dissolved, then remove from heat.
  11. Stir in chocolate until melted. 
  12. Cool about 10 mins.
  13. Spoon rounded ½ tsp expresso filling into indentation in each cookie and leave to set for an hour.

Saturday, 27 August 2016

Pineapple and Cherry Cake


Ingredients
Glace cherries - 150 gram
Canned pineapple with fruit juice - 227 gram
Softened butter - 150 gram
Light muscovado sugar - 100 gram
Eggs beaten lightly - 2 large
Self-raising flour - 200 gram
Pineapple and Cherry Loaf


Pineapple and Cherry Loaf


Recipe


  1. Pre-heat the oven to 140 ˚C fan. Grease and line a loaf tin.
  2. Chop the glace cherries into halves and wash them using running water. Drain well and dry on a kitchen towel. Drain the pineapples keeping aside about two tablespoons of the fruit juice, chop the pineapples and dry them on a kitchen towel as well. Toss cherries and pineapple in plain flour.
  3. Mix butter, sugar, eggs, and the flour.
  4. Now fold in the pineapples and cherries along with the 2 tablespoons of fruit juice from the canned pineapples. Pour the batter into the prepared tin.
  5. Bake it in a pre-heated oven for an hour and 15 till the loaf is golden brown, well risen and a skewer comes out clean. Cool the loaf on a wire rack. It can be stored for a couple of days but it hardly lasted the same day in my house!


Note: 
For a cake, I used 2.5 times of all ingredients and spring-form cake tin. Make sure to leave the loaf inside the oven(switched off) for a while after it is done.

Glace cherries - 375 gram
Canned pineapple with fruit juice - 565 gram
Softened butter - 375 gram
Light muscovado sugar - 250 gram
Eggs beaten lightly - 5 large
Self-raising flour - 500 gram

Saturday, 2 July 2016

Date Cheese Cake


Date Cheese Cake


Ingredients


FOR THE BASE 75g/3oz digestive biscuits
40g/1½oz butter
25g/1oz demierara sugar

FOR THE FILLING 50g/2oz butter, softened
175g/6oz caster sugar
450g/1lb cream cheese (full fat soft cheese)
25g/1oz plain flour
1 lemon, juice and finely grated rind
3 eggs, separated
150ml/5fl oz double cream, lightly whipped


FOR THE TOPPING 150ml/5fl oz double cream, whipped
Dates - 20
a little icing sugar (optional)


Date Cheese Cake


Recipe

  1. Lightly grease a 23cm/9inch loose-bottomed round cake tin. Cut a strip of non-stick baking parchment to fit around the sides of the tin, fold the bottom edge of the strip up by about 2.5cm/1inch creasing it firmly, then open out the fold and cut slanting lines into this narrow strip at intervals. Fit this into the greased tin with the snipped edge in the base of the tin and put a circle of non-stick baking parchment on top. 
  2. Preheat the oven to 160C. 
  3. Put the digestive biscuits into a polythene bag and crush the biscuits with a rolling pin. Melt the butter in a medium pan; add the crushed biscuits and demerara sugar. 
  4. Mix well, spread over the base of the tin and press firmly with the back of a metal spoon. Leave in a cool place to set whilst mixing the cheesecake. 
  5. For the cheesecake, measure the butter, sugar, cheese, flour, lemon rind and juice and egg yolks into a large bowl and beat well until smooth. 
  6. Fold the lightly whipped double cream into the mixture using a plastic spatula or large metal spoon. 
  7. Whisk the egg whites with a hand held electric mixer until stiff but not dry and fold into the mixture. 
  8. Pour on to the biscuit base and gently level the surface with a plastic spatula. 
  9. Cut Dates into halves, take the seed out then gently put them in the tin on the top. 
  10. Bake in the preheated oven for about 1/1¼ hours or until set. 
  11. Turn off the oven and leave the cheesecake inside for a further one hour to cool. 
  12. Run a small palette knife around the edge of the tin to loosen the cheesecake then push the base up through the cake tin. 
  13. Remove the side paper and put the cheesecake on to a serving plate.

Optional: Spread the lightly whipped cream in the dip of the cheesecake and scatter the fruits haphazardly on top. Lightly dust with icing sugar if wished.

Saturday, 18 June 2016

Nimish


Ingredients

Double cream - 450 gram
Icing sugar - 50 gram
Rosewater - 1 tsp
Pinch saffron strands (soaked in 100 ml warm milk for 15 minutes)
few chopped pistachios and edible silver leaf (optional)

Nimish

Recipe

  1. Whip the cream in a bowl until soft peaks just start to form – it’s important not to over-whisk it.
  2. Sift in the icing sugar, then add the rosewater and the now cool saffron milk and strands. Whisk together for a minute until smooth and a few bubbles appear on the surface. 
  3. Pour gently into small serving bowls or glasses and chill overnight.
  4. Decorate with sliced pistachios, and silver leaf if you like. Serve.

Friday, 20 May 2016

Coffee Cake


Coffee Cake with Whipped Cream Frosting


Ingredients

Self raising flour - 1 and 1/2 cups
Eggs - 3 medium
Baking powder - 1 teaspoon
Vegetable Oil - 90 ml
Water - 180 ml
Sugar - 1 and 1/2 cups
Double Cream - 250 ml
Icing Sugar - 3 or 4 tablespoon


Recipe
  1. Mix ingredients  with electric whisk for 3-4 minutes.
  2. Bake in oven fan assisted 180 degrees for 45 minutes.
  3. Coffee mixture -
    •  In 500ml of water dissolve 2-3 tablespoon  of coffee depending how strong you want your coffee cake. 
    • Add 1 tablespoon of sugar.
  4. Once cake is baked cut in half and let it cool.
  5. Then pour the coffee mixture all over the two halves of cake so the cake is soaked. 
  6. Put in refrigerator  to cool.
  7. Whisk double cream about 250 ml with 3-4 tablespoon of icing sugar, depending again how sweet you like and pour little bit of coffee mixture  in it.
  8. Once cake is cooler, spread the cream mixture between the 2 layer of cake and on top.

Friday, 22 April 2016

Victoria Sponge Cake


Ingredients
Eggs 4
Caster sugar 225g
Self-raising flour 225g
Baking powder 2 teaspoon
Unsalted butter at room temperature 225g

Strawberry or raspberry jam
Whipped double cream


Victoria Sponge Cake

Recipe
  1. Preheat the oven to 180C/160C Fan.
  2. Grease and line two 20cm/8in sandwich tins. Use a piece of baking paper to rub a little butter around the inside of the tins until the sides and base are lightly coated, then line the bottom with a circle of baking paper.
  3. Break the eggs into a large mixing bowl, add sugar, flour, baking powder and butter.
  4. Mix together until well combined with an electric hand mixer (you can also use a wooden spoon), but be careful not to over mix. The finished mixture should fall off a spoon easily.
  5. Divide the mixture evenly between the tins.
  6. Bake the cakes on the middle shelf of the oven for 25 minutes. Check them after 20 minutes.
  7. To assemble the cake, place one cake upside down onto a plate and spread it with plenty of jam.
  8. If you want to, you can spread over whipped cream too.
  9. Top with the second cake, top-side up.
  10. Sprinkle over the caster sugar.


Nankhatai

Ingredients

1 1/2 cup – Maida (flour)
1/2 cup – Caster sugar
1/2 cup – Ghee, at room temperature
1/4 tsp – Vanilla essence
1/2 tsp – Powdered cardamom
Slivers of pistachio and almonds, for topping
Recipe
  1. Using your hands, rub in the cardamom powder with the sugar until it’s fragrant.
  2. Now, add the ghee and mix until light and creamy. Add vanilla essence and mix well.
  3. Sift the maida and add to the mixture.
  4. Using your hands, knead the mixture into a slightly crumbly dough.
  5. Shape the dough into tiny balls.
  6. Flatten the biscuit slightly, and add a chironji or almond sliver to the centre. I couldn’t find any chironji in Bengaluru, and so went without.
  7. Bake at 170 degrees Celsius for 15-18 minutes.

Coffee Walnut Cake

Ingredients
For the sponges
  • 340g unsalted butter, plus extra for greasing
  • 340g caster sugar
  • 250g plain flour
  • 90g walnuts
  • 3 tsp baking powder
  • 6 large eggs
  • 3 tsp instant coffee dissolved in 1.5 tbsp boiling water
For the frosting / topping
  • 750g icing sugar
  • 250g unsalted butter
  • 4 tsp instant coffee dissolved in 2 tbsp boiling water
  • 2 tbsp milk
  • approx 9 walnut halves for decorating
Equipment needed
  • 3 - round sandwich tins (20cm)
  • Baking parchment
  • Stand mixer or electric hand whisk
  • Food processor
  • Offset palette knife
  • Silicone spatula
  • Sieve
  • Kitchen scales
  • 2 x wire cooling racks
  • Display plate or cake board


Recipe
  1. Preheat the oven to 180oC / 160oC Fan / Gas Mark 4 (I have a fan oven so all my recipes are tested at the fan temperatures). To make the sponges, grease and line three 20cm sandwich tins with baking parchment. If you only have one or two tins, you can still do the cake, but you’ll have to do the baking in batches
  2. Weigh out the walnut halves and dry fry in a frying pan over a medium heat for 5 minutes, or until the oils start to release the walnut aroma. Set aside to cool while you prepare the rest of the sponge mixture
  3. Beat together the sugar and butter with an electric hand whisk, or a stand mixer if you have one, until they are light coloured, smooth and creamy. Beat in each egg thoroughly, one by one (rather than dropping them all in together). If the mixture starts to split, just add a tablespoon of flour and continue beating – this will bring the mixture back
  4. Dissolve the coffee in the boiling water and fold this into the wet mix
  5. Weigh and measure the flour and the baking powder and put into a food processor. Add the cooled walnuts. Blitz thoroughly until all the nuts are incorporated and form a light, fine powder
  6. (If you don’t have a food processor, you can try crushing the walnuts as small as possible by putting them in a sandwich bag and whacking them with a rolling pin but it will be difficult to get them fine enough to work in the cake)
  7. Fold the dry ingredients into the wet mixture using a silicone spatula, making sure to mix any flour that ends up at the bottom of the bowl. Be gentle when you’re folding in the flour – you don’t want to knock out any air you’ve incorporated into the mix through all that whisking!
  8. Divide the mixture evenly between the three tins. Smooth out the surface of the sponge mixtures with an offset palette knife and bake for about 23-28 minutes (keep an eye on it from 20 minutes), or until a cocktail stick comes out clean when poked into the centre of the sponge
  9. Remove from the oven and when the tins have cooled enough to handle, take the sponges out of the tins and set to cool on wire racks
  10. While the sponges are cooling, prepare the coffee butter cream icing. Weigh the butter into a bowl and beat with an electric hand whisk until soft. Gradually add the icing sugar and continue to mix. Make up the coffee and beat into the mixture. Add 2 tbsp milk if you need to loosen the butter cream a little more
  11. Once the sponges have cooled, if they have raised middles, slice the tops flat with a bread knife (I usually spread a bit of the icing on the off cuts to taste a secret preview of the final cake)
  12. Put the bottom sponge on your display plate or cake board. Neatly spread about 1/3 of the butter-cream icing onto the bottom layer of sponge using an offset palette knife. Try to spread evenly, and right up to the edges of the sponge, so you can see a neat line of icing once the top layer of sponge goes on
  13. Add the next sponge and repeat. Turn the top layer of sponge upside down and lie on top of the spread icing; pressing down gently, and scraping off any excess icing that squidges out of the middle
  14. Using the offset palette knife, neatly spread the remaining icing on the top of the cake and garnish with the remaining walnut halves.

Monday, 13 July 2015

Kunafa

Kunafa (also spelled knafeh, Kunafeh, kunafeh, knafeh, or kunafah) is a Mediterranean cheese pastry soaked in sweet sugar-based syrup, typical of the regions belonging to the former Ottoman Empire. Kunafa  is especially popular during the month of Ramadan.

Naboulsi or akawi cheese is layered between the crispy thin Kataifi pastry dough. The flavoured sugar syrup and crunchy nuts are added for perfect finish. You may substitute kataifi  with thin vermicelli, and naboulsi or akawi Cheese with ricotta and fresh mozzarella.

Kunafa


Ingredients

Vermicelli (or Kataifi) - 200 gms
Butter - 50 gms (unsalted)
Ricotta - 200 gms
Mozzarella - 100 gms (shredded)
Sugar - 1 and 1/2 cup
Water - 1 cup
Lemon - 2 table spoon
Cinnamon - 1 stick

For garnish (add or remove based on choice):
Almonds - 5 (blanched)
Dates - 5 (dried and chopped)
Golden Raisins - 10
Cashew - 5
Walnuts - 5
Green Pistachio - 5


Recipe

  1. Preheat the oven to 180C/350F/Gas 4.
  2. Grease and line 8 inch sandwich tin (use a piece of baking paper to rub a little baking spread or butter around the inside of the tins until the sides and base are lightly coated), line the bottom of the tins with a circle of baking paper.
  3. Break vermicelli into small pieces and roast in butter. You may add 2 tablespoon of water, so that vermicelli is soft, make sure that it is not mushy.
  4. Spread half of vermicelli in the baking dish, press down lightly.
  5. Spread ricotta cheese evenly.
  6. Spread mozzarella evenly.
  7. Cover with remaining vermicelli.
  8. Bake for about 30 to 40 minutes until lightly golden-brown.
  9. In the meanwhile prepare the sugar syrup, in a heavy bottomed saucepan add water over medium heat.
  10. After two minutes add sugar and lemon juice.
  11. Add cinnamon stick (or 5 strands of saffron depending on your personal preference).
  12. Stir to combine and bring to a boil. Let simmer to a syrupy consistency.
  13. Remove from heat and let it cool, remove cinnamon stick. Make sure that the syrup does not get hardened.
  14. When vermicelli is baked, take it out of oven and immediately pour cold sugar syrup evenly over the hot vermicelli. 
  15. Let cool completely to room temperature.
  16. Loosen the edges and invert onto the serving plate.
  17. For garnishing lightly roast all the dried fruits and nut, chop them into small pieces.
  18. Sprinkle the garnish all over. Slice in squares and serve.

Variations
  • You may boil half cup of milk with 3 table spoon of semolina and 3 table spoon sugar, make it thick and then let it cool. Mix cheese with it until it gets a smoother texture.
  • Another option is to make a filling of mawa or Khoya instead of cheese, add chenna (coagulated milk) and 3 table spoon sugar to it.
  • May replace cheese with cream (malai).
  • Remember the syrup shouldn't be hot, it should be of room temperature. Neither should it get crystallised.
  • You may garnish with small pieces of mango or banana instead of dry fruits.